How-To Guides
Practical step-by-step guides for common warehouse operations and scenarios.
How to Onboard a New Client
Use this checklist when setting up a new 3PL client from scratch.
Checklist
- [ ] Customer record — Create Customer with
is_3pl_clientchecked andclient_codeset - [ ] Client Items — Map client SKUs to internal items (import from client's item catalog)
- [ ] Inventory Policy — Create at least one policy for this client (or verify system default applies)
- [ ] Rate Card — Create a Rate Card with rates for all activity types; submit it
- [ ] Link Rate Card — Set the Rate Card as the client's
default_rate_card - [ ] Warehouse Locations — Confirm dedicated bins are assigned or zones are available
- [ ] User Access — Create a portal user for the client if client self-service is needed
- [ ] Test Receiving — Create a test ASN and Receiving with 1 item to verify the full flow
- [ ] Test Order — Create a test Client Order, wave it, pick it, pack it, verify Delivery Note and billing
Estimated Setup Time
| Task | Time |
|---|---|
| Customer + Rate Card | 15 minutes |
| Item / Client Item setup | 30–60 minutes (depends on SKU count) |
| Policy configuration | 15 minutes |
| Test transactions | 30 minutes |
| Total | ~2 hours |
TIP
For large catalogs (1000+ SKUs), use the CSV import tool in ERPNext: Data → Import Data → Item and Warehouse 3PL → Client Item importers.
How to Handle a Short Shipment
A short shipment occurs when the supplier ships fewer units than stated on the PO/ASN.
Steps
- Receive what arrived — Create a Receiving with the actual quantities received (not the ASN quantities)
- Note the discrepancy — In the Receiving's Notes field, document the shortage details
- Check ASN status — The ASN will show as "Partially Received" with open quantity
- Notify the client — Export the receiving vs. ASN comparison from the Discrepancy Report
- Client decides — The client will instruct one of:
| Client Instruction | Action |
|---|---|
| Wait for balance | Leave ASN open; create new Receiving when balance arrives |
| Accept short ship | Close the ASN manually; file claims separately |
| Cancel balance | Cancel remaining ASN lines; update client's PO |
- Update ASN — Close or partially cancel the ASN per client instructions
- Document — Attach any carrier/supplier correspondence to the ASN
WARNING
Do not create a Receiving for more than physically arrived. Always record the actual received quantity, even if it means the ASN stays partially open indefinitely.
How to Handle Damaged Goods
Damaged goods must be isolated from sellable inventory immediately.
On Receipt
- During Receiving, set Condition = Damaged on the affected line items
- Record the extent of damage in the item's notes
- Take photos and attach them to the Receiving document
- On submit, damaged lines automatically go to the Quarantine warehouse (not Staging)
- No Putaway Task is created for damaged goods
After Receipt
Once goods are in Quarantine:
- Create an Inspection Record (manual) documenting the damage
- Notify the client with the damage report and photos
- Await client instruction:
| Disposition | Action |
|---|---|
| Return to supplier | Create Stock Entry (Transfer out of Quarantine to Return zone) |
| Scrap / dispose | Create Stock Entry (Scrap) — removes from ledger |
| Salvage / rework | Transfer to Rework zone; process as special handling |
| Accept as-is | Transfer to normal storage with a damage note |
- Create a Billing Transaction for any handling charges (rework, return labeling, etc.)
- Close the Inspection Record
INFO
All Stock Entries for damaged goods are at $0 value (same as normal stock). Clients handle the insurance/claim process separately — your role is to document and preserve evidence.
How to Process a Rush Order
Rush orders bypass the normal wave batching process and are picked and shipped immediately.
Steps
- Create a Client Order with Priority = Rush
- Submit the Order — inventory is allocated immediately
- Skip Wave creation — for rush orders, you can release directly:
- Open the Client Order
- Click Direct Release (bypasses Wave)
- This creates Pick Tasks directly without a Wave
- Notify the team — Rush Pick Tasks appear at the top of the pick queue (sorted by priority)
- Operator picks immediately — complete Pick Tasks as fast as possible
- Pack and ship — complete Pack Task and arrange priority carrier pickup
Rush Billing
Rush orders typically carry a surcharge. Add a manual Billing Transaction after shipping:
- Activity Type: Special Handling
- Description: "Rush order handling surcharge"
- Qty: 1
- Rate: per your Rate Card (or negotiate with client)
TIP
Create a dedicated "Rush Handling" activity type and rate in the Rate Card if rush orders are frequent. This allows the surcharge to be applied automatically via a webhook or manual trigger.
How to Check Client Inventory
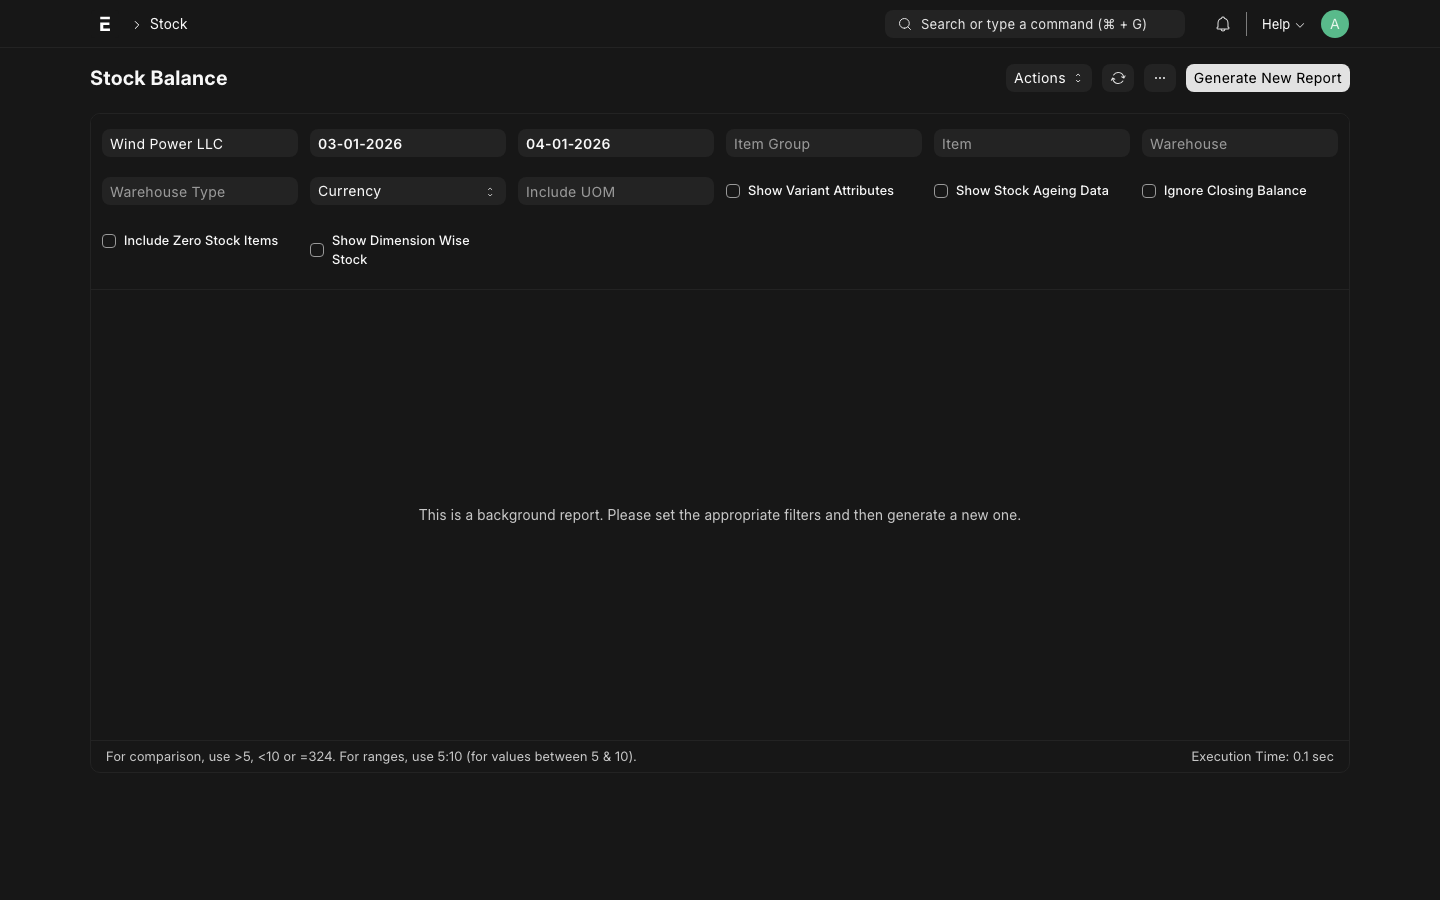
The Stock Balance report shows current on-hand inventory per client, item, and location.
Steps
- Go to Warehouse 3PL → Stock Balance
- Filter by Client to see one client's inventory
- Filter by Item or Item Group to narrow to specific products
- Filter by Warehouse or Zone to see specific locations
What You Can See
| Column | Description |
|---|---|
| Item | Internal item code and description |
| Client SKU | Client's own part number (from Client Item) |
| Warehouse | Zone / warehouse holding the stock |
| Location | Specific bin address |
| Batch | Lot/batch number |
| Expiry | Expiry date (if lot-tracked) |
| Qty on Hand | Current physical quantity |
| Qty Allocated | Quantity reserved for open Client Orders |
| Qty Available | On Hand minus Allocated |
TIP
Share the Stock Balance report with clients via the ERPNext portal or by exporting to Excel. The report respects client-level permissions — a client portal user only sees their own inventory.
Emailing a Stock Report to a Client
- Open Stock Balance report
- Filter to the client
- Click Export → Excel or use Email to send directly
- The email goes to the client's primary contact
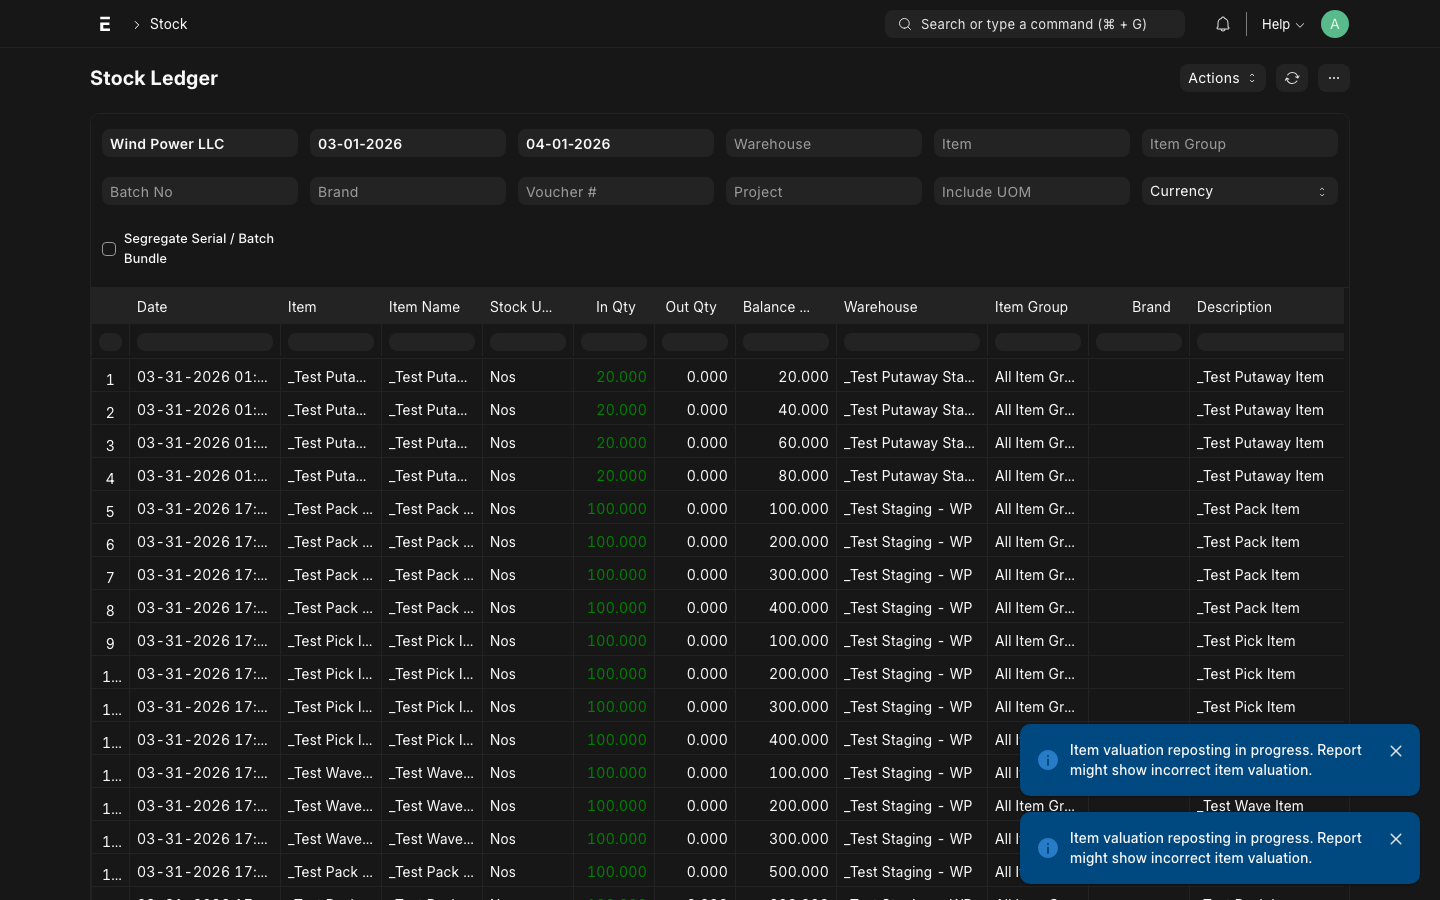
How to View Stock Movements
The Stock Ledger shows every stock transaction — receipts, transfers, picks, and shipments — with full audit trail.
Steps
- Go to Stock → Stock Ledger (standard ERPNext report)
- Apply filters:
- Item: specific item code
- Warehouse: filter by zone
- From Date / To Date: date range
- For 3PL-specific context, also filter by 3PL Reference (links back to Receiving, Pick Task, etc.)
Reading the Stock Ledger
| Column | Meaning |
|---|---|
| Date | Transaction date/time |
| Item | Item code |
| Warehouse | Warehouse affected |
| Qty | Change in quantity (+ve = in, -ve = out) |
| Balance Qty | Running total in this warehouse |
| Valuation Rate | $0 for 3PL stock (zero-value accounting) |
| Voucher Type | Type of ERPNext document (Stock Entry, Delivery Note) |
| Voucher No | Document ID — click to open |
INFO
The Voucher No column links back to the ERPNext document that caused the stock movement. For 3PL operations, Stock Entries will also show the 3pl_reference_name (Receiving ID, Pick Task ID, etc.) for traceability back to the 3PL document.
Common Voucher Types
| Voucher Type | 3PL Context |
|---|---|
| Stock Entry (Material Receipt) | Inbound Receiving |
| Stock Entry (Material Transfer) | Putaway or Pick |
| Delivery Note | Outbound shipment |
| Stock Entry (Material Issue) | Scrap / disposal |
How to Correct a Stock Error
If a stock count or entry contains an error:
For Counting Errors
- Perform a Physical Inventory Count at the affected bin
- Create an ERPNext Stock Reconciliation to adjust the quantity
- Add a note explaining the correction
- Notify the client of the adjustment with the Stock Reconciliation number
For Entry Errors (wrong item, wrong warehouse)
- Do not delete submitted documents — create a reversal instead
- For Receiving errors: create a Stock Entry (Material Transfer Out) to move stock back
- Create the correct Stock Entry or document
- Document both the error and the correction in the Notes field
WARNING
Never delete submitted Stock Entries or Delivery Notes in a live system. ERPNext's audit trail depends on the complete history. Always reverse and re-enter.