Inbound Workflow: ASN → Receiving → Putaway
The inbound workflow manages the receipt of goods from a client's suppliers into the warehouse. It follows a three-stage process designed to enforce advance notice, accurate counting, and directed bin storage.
Warehouse Job Record
All inbound documents (ASN, Receiving, Putaway) can be linked to a Warehouse Job Record for end-to-end tracking and P&L visibility. Create the Job Record first, then use Create → Create ASN from the Job to auto-link.
Flow Diagram
Step 1: Create an ASN
An Advance Shipment Notice (ASN) is created before goods physically arrive. It gives the warehouse advance notice of what to expect — client, supplier, expected items, quantities, and ETA.
Why Use ASNs?
- Pre-allocate dock doors and labor before the truck arrives
- Pre-create putaway plans so operators know exactly where to put things
- Identify discrepancies between expected and received quantities
- Enable cross-docking for urgent orders
How to Create
- Go to Warehouse 3PL → ASN → New
- Set Client — the 3PL customer whose goods are arriving
- Set Supplier (optional but recommended)
- Set Expected Arrival Date
- Add items in the Items table:
- Item or Client SKU (resolved via Client Item mapping)
- Expected Qty
- UOM
- Batch / Lot (if lot-tracked)
- PO Number (client's purchase order reference)
- Save and Submit the ASN
Key Fields
| Field | Required | Description |
|---|---|---|
| Client | Yes | The 3PL client whose goods are arriving |
| Supplier | No | Supplier name for reference |
| Expected Arrival Date | Yes | Used for dock scheduling |
| Reference Number | No | Client's PO or shipment reference |
| Items | Yes | Expected line items with quantities |

TIP
If you receive EDI 856 (ASN) messages from clients, they can be imported directly into the ASN doctype via the REST API. The client_sku field resolves to the internal item via Client Item mapping.
ASN Statuses
| Status | Meaning |
|---|---|
| Draft | Being prepared, not yet sent to dock |
| Submitted | Confirmed, visible to dock staff |
| Partially Received | Some items received, ASN still open |
| Received | All expected items received and matched |
| Closed | Manually closed (short-shipped, cancelled) |
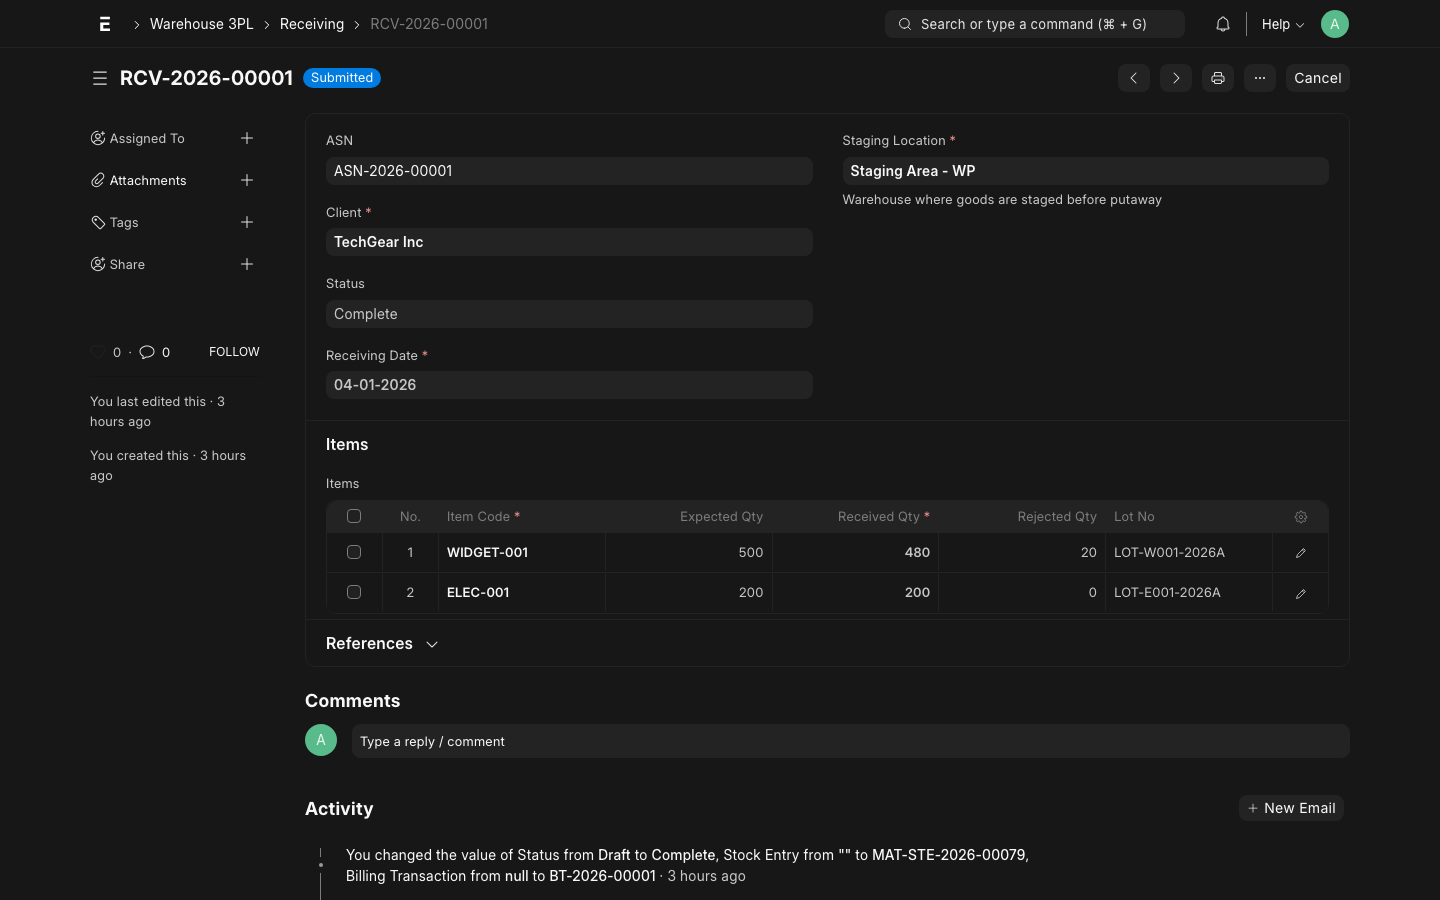
Step 2: Create a Receiving
A Receiving document records the actual physical receipt of goods at the dock. It captures what was actually received — which may differ from the ASN.
How to Create
- Go to Warehouse 3PL → Receiving → New
- Link the ASN (optional, but auto-populates items if linked)
- Set Client and Receiving Date
- Set Target Warehouse (usually the Staging zone)
- Add or verify items in the Items table:
- Item, Received Qty, UOM
- Batch / Serial No if applicable
- Condition (Good / Damaged / Quarantine)
- Temperature on Arrival (for cold chain items)
- Submit the Receiving
What Happens on Submit
Submitting a Receiving triggers the following automatically:
1. Stock Entry (Receipt)
A Material Receipt Stock Entry is created, posting all received items into the Staging warehouse at $0 valuation. This adds the goods to ERPNext's stock ledger.
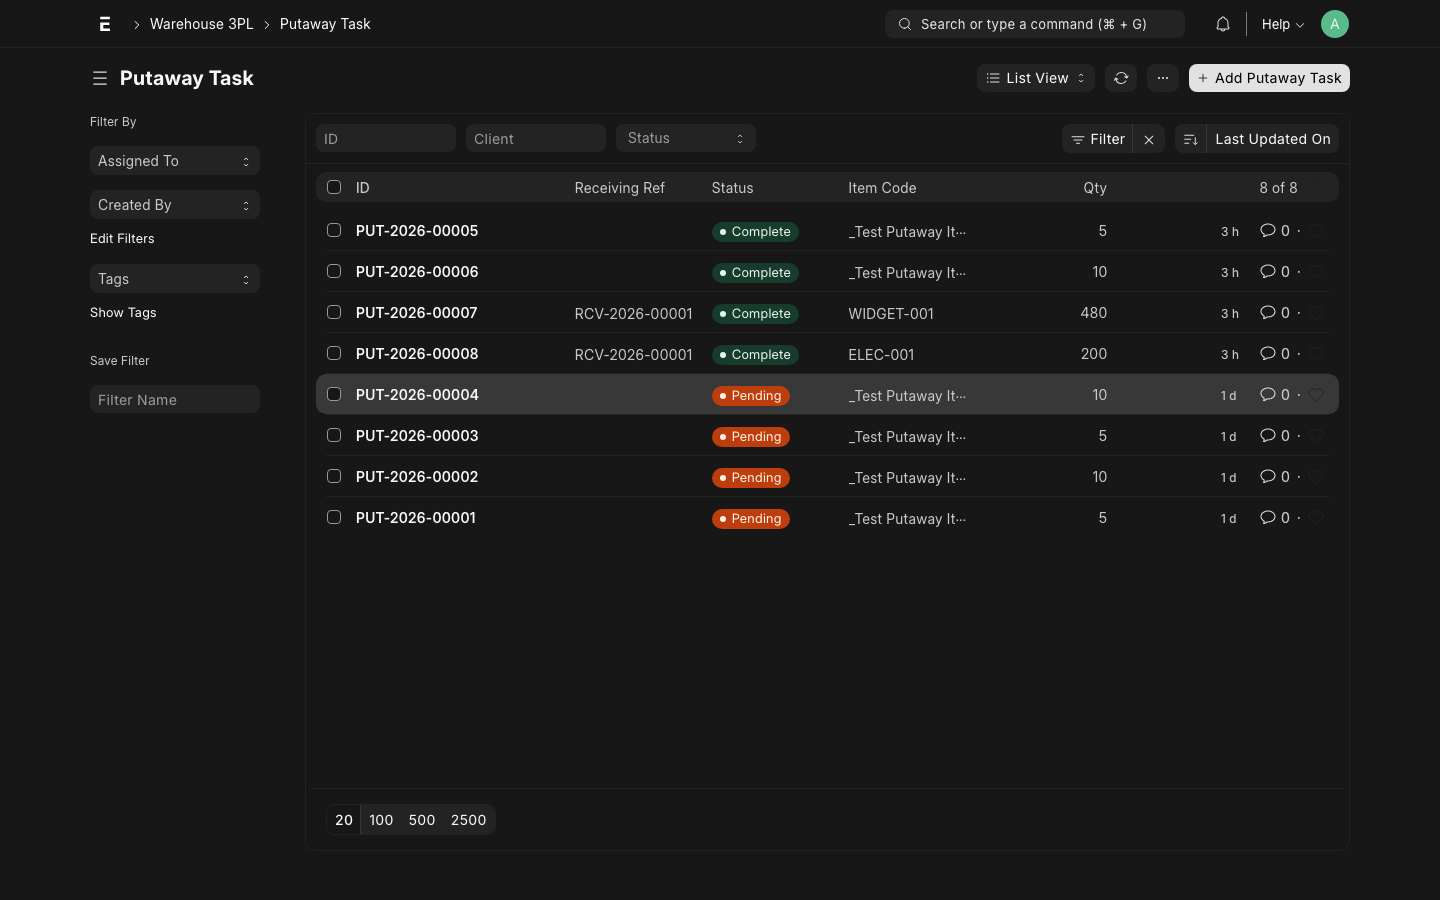
2. Putaway Tasks
One Putaway Task is created per receiving line (or per bin if the system splits the quantity across multiple bins). Each task contains:
- Item, Qty to put away
- Suggested destination bin (from Inventory Policy rules)
- Operator assignment (optional)
3. Billing Transaction
A Billing Transaction is automatically created for the Receiving activity:
- Activity Type:
Receiving - Qty: total units received
- Rate: looked up from client's Rate Card
- Amount: Qty × Rate
WARNING
Once submitted, the Receiving cannot be edited. If you need to correct quantities, create an Amendment or a separate Receiving for the difference. The ASN status will update automatically.
Receiving vs ASN Discrepancies
| Scenario | System Behavior |
|---|---|
| Received = Expected | ASN status → Received |
| Received < Expected | ASN status → Partially Received; open qty remains |
| Received > Expected | System allows over-receipt; ASN shows surplus |
| Item not on ASN | Can be added; ASN shows as unexpected receipt |
Step 3: Complete Putaway
Putaway Tasks instruct operators to move goods from the Staging area to their final bin locations. Each task shows the item, quantity, source (Staging), and destination bin.
Operator Workflow
- Go to Warehouse 3PL → Putaway Task (or mobile scan)
- Filter by status = "Open" to see pending tasks
- Open a task and review:
- Item, Qty
- Suggested Destination Location (bin address)
- Physically move the goods to the suggested bin
- Scan or confirm the bin barcode
- Set the Actual Destination if different from suggested
- Click Mark Complete
What Happens on Complete
When an operator marks a Putaway Task as Complete:
- A Material Transfer Stock Entry is created:
- From: Staging Warehouse
- To: Final bin's Warehouse
- Valuation: $0
- The Receiving is checked — if all putaway tasks are complete, the Receiving status updates to Put Away
- A Billing Transaction is created for the Putaway activity
TIP
If the operator cannot put goods to the suggested bin (e.g., bin is full), they can override the destination. The system will record the actual location and update stock accordingly.
Putaway Task Statuses
| Status | Meaning |
|---|---|
| Open | Goods are in Staging, awaiting movement |
| In Progress | Operator has started moving the goods |
| Complete | Goods moved, stock entry created |
| Cancelled | Task cancelled (goods returned to staging or disposed) |
Handling Exceptions
Short Shipment
When fewer items arrive than expected:
- Record the actual received quantity on the Receiving
- The ASN status changes to Partially Received
- Notify the client — they may choose to:
- Wait for the remainder (leave ASN open)
- Accept the short shipment and close the ASN
- File a claim against the supplier
Damaged Goods
If items arrive damaged:
- On the Receiving, set Condition = Damaged for affected lines
- The system posts damaged goods to a Quarantine warehouse (not to Staging)
- A Putaway Task is NOT created for damaged goods
- Document damage with photos in the Receiving's attachment section
- Notify the client — they will instruct disposition (return, scrap, or rework)
WARNING
Damaged goods held in Quarantine are still on the client's stock ledger. The client must authorize disposition before the goods are removed from stock.
Temperature Deviation
For cold chain items:
- Record Temperature on Arrival in the Receiving item
- If temperature is outside the acceptable range (per Inventory Policy), the system flags the line
- Flagged items go to Quarantine automatically
- Generate a temperature deviation report for the client
Discrepancy Report
For significant discrepancies (wrong items, severe short shipments), use the Discrepancy Report tool:
Warehouse 3PL → Tools → Receiving Discrepancy ReportThis generates a formatted report that can be emailed directly to the client from the system.